
Nothing ruins a perfect afternoon at the campsite faster than the relentless midday sun beating down on your rig. Your awning serves as the primary defense against the heat, creating that essential outdoor living space we all crave for relaxing or entertaining. However, when it’s time to replace torn fabric or damaged hardware, the process can get tricky.
Many owners guess rather than measure, leading to costly returns and installation frustration. Understanding RV awning size specifications is the only way to guarantee you get the right parts for your specific setup.
The Difference Between Fabric Width and Awning Size
The most common mistake RV owners make involves confusing the fabric width with the actual awning size. You might assume that if you measure your fabric and it comes out to 15 feet, you should order a 15-foot awning.
If you do this, you will end up with a part that does not fit your recreational vehicle. In the RV industry, manufacturers size the entire assembly based on the distance between the centers of the two vertical arms.
This distinction is important because the fabric is always shorter than the assembly’s total width. Manufacturers cut the fabric approximately ten inches shorter than the stated awning size to accommodate the end caps, springs, and drive heads located inside the roller tube. Always rely on the hardware measurements rather than the textile width when ordering replacements.

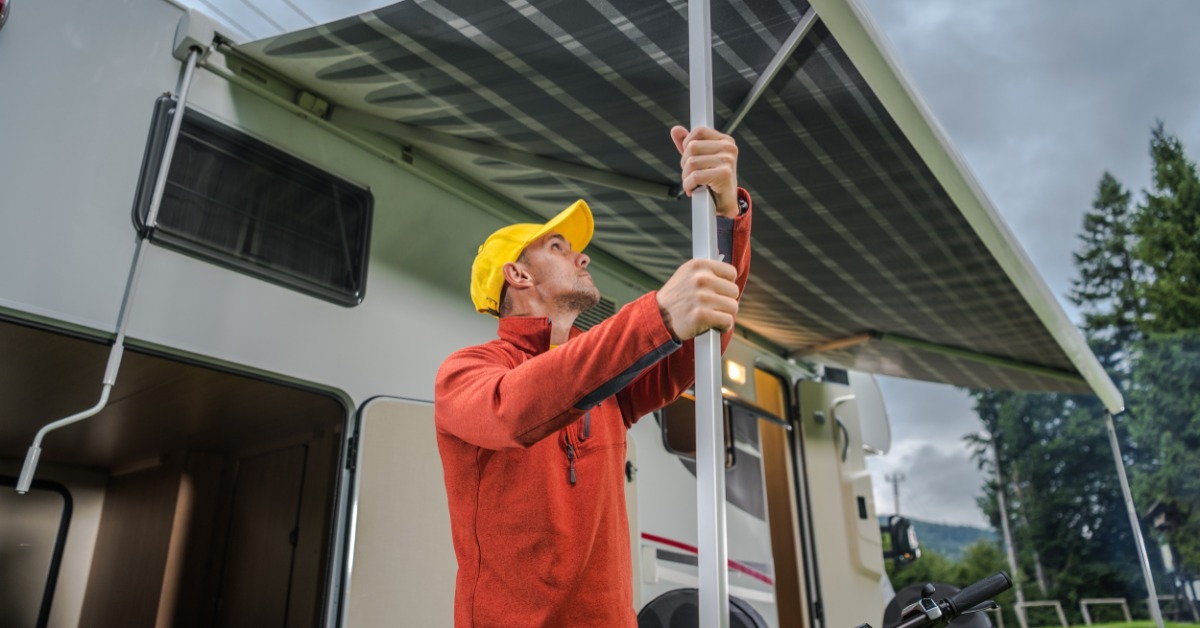
Measuring Your Current Setup Correctly
Getting an accurate measurement requires a tape measure and, ideally, a helper to hold the other end. You need to measure from the center of the drive head on the right arm to the center of the idler head on the left arm. This measurement usually lands on a whole number, such as 14, 15, or 16 feet.
If your measurement is off by an inch or two, round to the nearest whole foot, as this is likely the standard manufacturing size. Refrain from measuring your old fabric to determine the size. Over years of exposure to sun, rain, and wind, vinyl and acrylic materials can shrink or stretch, leading to inaccurate measurements.
This leaves unsightly gaps along the sides and exposes the roller tube to the elements, which can lead to premature rusting or mechanical failure.
What To Consider for New Installations
If your rig does not currently have an awning and you want to install one from scratch, the measuring process changes slightly. You must look for a clear, unobstructed area along the side of your RV.
You then need to identify a space above the windows and entry doors that remains below the roofline. This area, known as the header rail location, must have structural backing behind the fiberglass or aluminum siding to support the unit’s weight.
You also have to check the vertical space for the arms. The support arms will run down the side of the vehicle, so you must verify that they will not block storage compartments, windows, or vents.
Understanding Projection Depth
While width gets all the attention, the projection, which is how far the awning extends out from the vehicle, matters just as much for your comfort. Standard awnings typically extend 8 feet from the rail. However, newer models and specific brands offer projections ranging from 6 feet for smaller trailers up to 10 feet for luxury motorhomes.
The projection size becomes technically important if you have slide-outs on the patio side of your RV. You need to verify that the roller tube will clear the top of the slide-out room when the awning is deployed. If the pitch is too steep or the projection is too short, the fabric might rub against the sharp corners of the slide-out, causing tears.
Hardware Specifications and Compatibility
Not all support arms are compatible with every roller tube, and mixing brands often leads to mechanical failure. The two main components of the hardware are the roller assembly and the arm set. The arm set size depends on the measurement of the floor line to the awning rail. This is the vertical distance from the floor of the RV (where the bottom of the arm mounts) to the top rail where the fabric attaches.
Manufacturers produce distinct arm shapes, usually categorized as straight or curved. The shape often dictates how close the hardware sits to the side of the vehicle. Furthermore, electric awnings require different torque specifications and heavier-duty arms than manual counterparts because the motor adds weight and torque to the system.
The Role of Fabric Material on Sizing
While the material choice might seem like a cosmetic preference, it impacts how the system handles tension and weight. Vinyl serves as the industry standard; it is heavy, durable, and waterproof.
Because it is a single piece of heavy material, it requires a strong roller tube and tension springs to roll up straight. If you put a heavy-duty vinyl canopy on a roller tube designed for lightweight acrylic, the tube may bow in the center, causing the fabric to wrinkle and pool water.
Acrylic fabric breathes better and dries faster, but it is a woven material. This means it lacks vinyl’s inherent dimensional stability. Acrylic awnings often require a metal weather shield (an Alumaguard), which adds diameter to protect the fabric when rolled up.
Common Pitfalls When Ordering Parts
One specific area that trips up many RV owners involves the difference between “universal” replacement fabrics and OEM-specific cuts. A universal fabric might have a standard size that fits most 16-foot awnings, but the attachment method might differ.
The poly cord (the rubber tube that slides into the rail) comes in different diameters. If the poly cord is too small, the fabric will pull out of the rail in high winds. If it is too big, you will struggle to slide it into the track.
Additionally, pay close attention to the specific generation of your hardware. Even if the external dimensions look the same, the internal mechanisms that assist in lifting the awning rely on precise weight calculations. Using the wrong size spring for your fabric width can make the awning impossible to roll up or dangerous to deploy.
Upgrade Without the Hassle
Getting the measurements right usually takes just a few minutes, but it saves hours of headache down the road. You can then confidently upgrade your outdoor space knowing that your new hardware will fit your rig perfectly. Understanding RV awning size specifications helps you maintain your vehicle without relying on expensive service centers or guessing at parts.
When it’s time to repair, replace, or upgrade your vehicle, make sure you explore the extensive selection of recreational vehicle parts and accessories at Mill Supply. We’ve got everything you need to keep your RV running smoothly and looking great, with essential components such as RV mirrors, brake parts, radiators and more! Don’t settle for less. Find the quality parts you can trust, all in one place!
Leave a Reply