
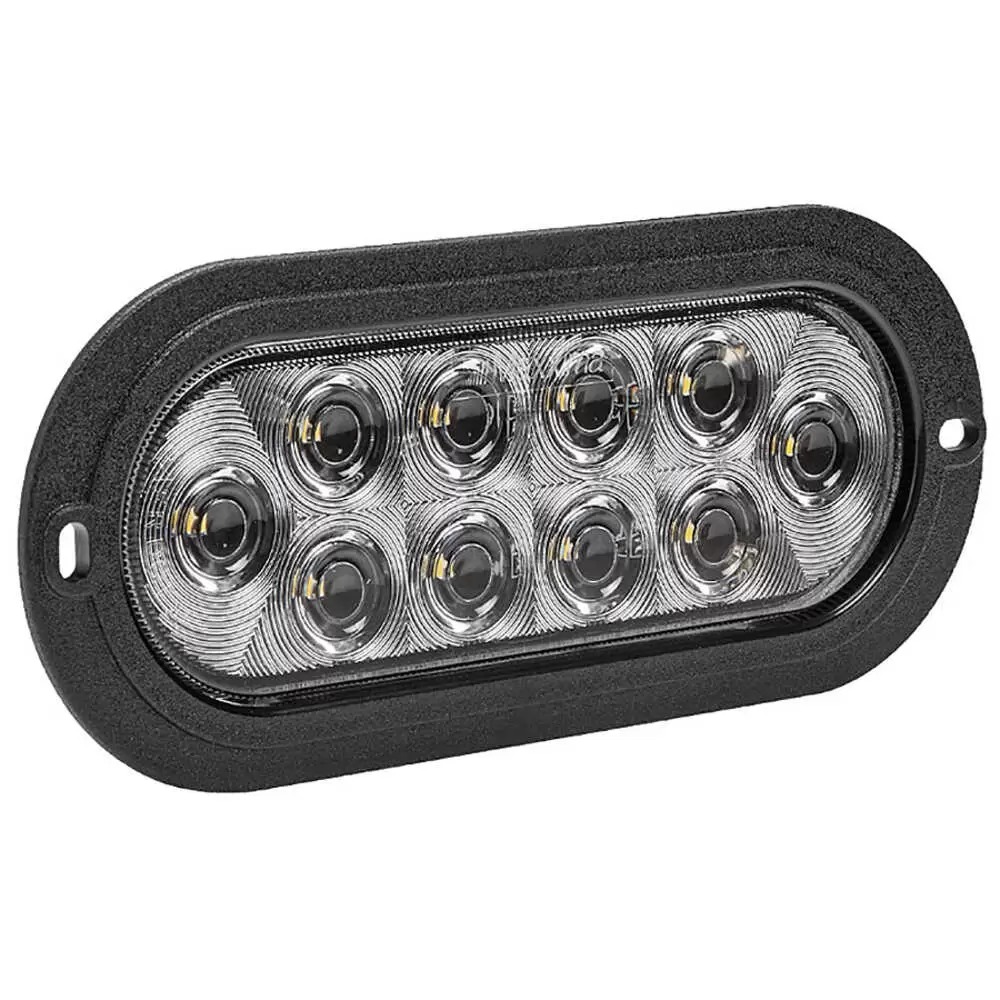
Backup lights serve two important purposes on a work vehicle. They help the driver see the area behind the truck, and they alert nearby people that the vehicle is moving in reverse. When a lamp becomes dim or damaged, you should replace it to restore both functions without creating new fitment problems.
Selecting a pre-mounted flange LED backup light is about more than just picking the brightest option. The flange has to fit your mounting surface, and the connector needs to match your existing harness. Even if a light looks great in the catalog, it can become the wrong choice if these details don’t line up.
What a Pre-Mounted Flange Assembly Includes
A flange-mounted backup light includes an outer mounting border that sits against the vehicle body. The flange usually includes holes for screws or bolts, which lets you secure the lamp directly to a flat surface.
Some assemblies integrate the flange into the lamp housing. Others use a trim or mounting component that comes with the light. In both cases, the flange helps you position the lamp and cover the edge of the body opening.
Why the Flange Matters
The flange does more than hold the lamp in place. It spreads out the mounting force to protect the assembly and the panel. A well-fitted flange also gives your repair a cleaner, more professional look.
Keep in mind, a flange will not fix a damaged panel! If the mounting area has rust or is bent out of shape, your new light will not sit flat. Address any surface issues before you install the new assembly.
Match the Lamp Shape to the Vehicle
Most pre-mounted flange LED backup lights come in either round or oval shapes. Usually, you will get the best results by matching what is already on your vehicle. Reusing the existing body opening saves time and helps you avoid extra modifications.
Do not rely on the advertised size alone when you compare lights! A lamp listed as four inches might actually be over five inches wide once you include the flange. Start by measuring the lens opening, then check how much mounting surface you have around it.
Check the Surrounding Clearance
Just because a lamp fits the hole does not mean it will clear everything nearby. Door hinges or body seams can get in the way and limit your available space.
Be sure to check behind the panel, too. The lamp housing and connector need enough depth to fit. Even if the outside looks slim, it does not mean the whole assembly will fit in a tight spot.

Confirm the Mounting Pattern
Flange assemblies may use two mounting holes or three. Round models can also use different patterns depending on the manufacturer and series. If your new lamp matches the existing mounting pattern, you will find the installation process to be much easier. If not, you might have to drill new holes, or buy a different light.
Measure from the center of one mounting hole to the center of the other. For three-hole patterns, record the position of each hole. A paper template can help confirm whether the flange sits correctly before any permanent work begins.
Your fasteners also need a solid mounting surface. If the metal around the hole is too thin or worn out, the lamp will not stay secure. Fix the panel first to give your flange a sturdy base to work with.
Choose the Right Connector Style
If the connector does not match, a quick light swap can turn into a wiring project. Before you order, check your existing plug and compare its shape to the product specs. Sealed connectors also help protect the circuit from overall moisture. They also support faster lamp replacement when the vehicle already uses the same connection. Keep in mind that the plug should engage firmly without forcing it.
Check Voltage and Current Draw
Most of the backup lights for stepvans and medium-duty trucks operate on 12-volt systems. However, you must always confirm that the lamp matches the vehicle electrical system before you install it.
LED backup lights usually draw less current than old-school incandescent bulbs. That lower demand reduces strain on your circuit, which is especially helpful if you are upgrading an older vehicle.
However, low draw can create compatibility issues in some monitored lighting systems. Some control modules expect the electrical load of an incandescent bulb. When that load disappears, the system may report a fault even though the LED lamp works.

Prepare the Mounting Surface Correctly
Remove the old lamp carefully so you do not damage the surrounding panel. Once you have it out, clean the mounting area. Even a little dirt can keep the new flange from sitting flat!
Then, check the surface for rust or corrosion. While a flange might hide minor flaws, never use it to cover up active rust. Repair the metal before you install the new light. Check whether the assembly includes a gasket, as some flange-mounted lights come with one. Use the gasket to help seal the connection between the flange and the body.
Do not use extra sealant to compensate for a poor fit! Too much sealant can keep the lamp from sitting flat and will complicate the next replacement.
Tighten the Fasteners Evenly
Start all the fasteners before you tighten any of them. This process lets the flange settle evenly against the panel. Afterward, tighten everything just enough so you do not crack the plastic trim. The lamp should stay secure without bending the flange. If you see one edge lifting, stop and check the mounting surface again.
Test the Light After Installation
Connect the lamp before you finish bolting everything down. Make sure you park the vehicle safely, then activate the reverse circuit and check that the light comes on steady, with no flicker.
While you are at it, gently move the harness and watch the lamp! If it flickers, you probably have a loose connection that you need to fix. Test the light pattern behind the vehicle after dark or in a shaded spot. Make sure the beam covers the area you need, and confirm that you can see the lamp easily from behind the truck.
After a road test, inspect the flange again. Sometimes vibration reveals movement you did not spot in the shop. Fix any looseness before you send the truck back out.
Make the Replacement Fit the Vehicle
A pre-mounted flange makes backup-light replacement easier, but you still need to choose carefully. The lamp must fit the body opening, and the connector must match your harness. Treat selecting a pre-mounted flange LED backup light as a fitment job first. Always measure before you order!
Ready to replace a damaged backup light or improve rear visibility? Mill Supply, Inc. carries dependable lighting components for stepvans and medium-duty vehicles, along with plow truck accessories built for demanding conditions. Review the mounting style and electrical connection before ordering, then choose parts that fit your vehicle without unnecessary modifications. Shop Mill Supply today to complete a cleaner installation and keep your vehicle prepared for daily challenges on the road.
Leave a Reply