Owning a vehicle is a practical investment, whether you’re using it for business or personal use. Over time, however, your car, truck, or van may show signs of wear and tear, especially on the body panels.
From dents and scratches to corrosion, damaged panels look unsightly and can compromise the structural integrity of your automobile. This complete guide to replacing auto body panels will walk you through the process, helping you keep your ride looking great and performing well.
The Importance of Replacing Auto Body Panels
Auto manufacturers design vehicles to withstand impacts and provide protection from collisions and outside elements. However, auto body panels can still experience damage that causes them to lose their structural integrity.
Damaged panels can lead to more significant problems, such as rust, moisture intrusion, and decreased aerodynamic efficiency. Replacing worn-out panels restores your vehicle’s appearance and prevents further damage, improving its longevity and value.
Step One: Identifying the Right Panels To Replace
Before working on any panels, it’s crucial to identify which ones need replacement. The most common areas of damage for cars, trucks, and vans are the front bumper, rocker panels, door panels, wheel arches and cab corners.
Check these areas for signs of damage, such as dents, scratches, and rust. Pay attention to any misaligned panels or gaps between them, which can indicate underlying damage.
Step Two: Choosing Between OE-Style and Slip-On Panels
One of the first decisions you need to make when replacing auto body panels is choosing between original equipment style panels (OE-Style) or Slip-On panels. The OE-Style panels are a stamped replica of the original manufacturer’s panel, ensuring an exact match in quality, fit, and design.
While they’re generally more expensive, OE-Style panels can offer better durability and a precise fit. On the other hand, the economical Slip-On panels are generally made of weaker gauged steel, resulting in a thinner, lighter weight panel. Slip-On panels are designed to be attached over top of the old panel with your choice of auto body adhesive, self-tapping screws, welding, or any other method you see fit, making them a more versatile and user-friendly option for someone who is inexperienced at welding.
Step Three: Gathering the Right Tools and Materials
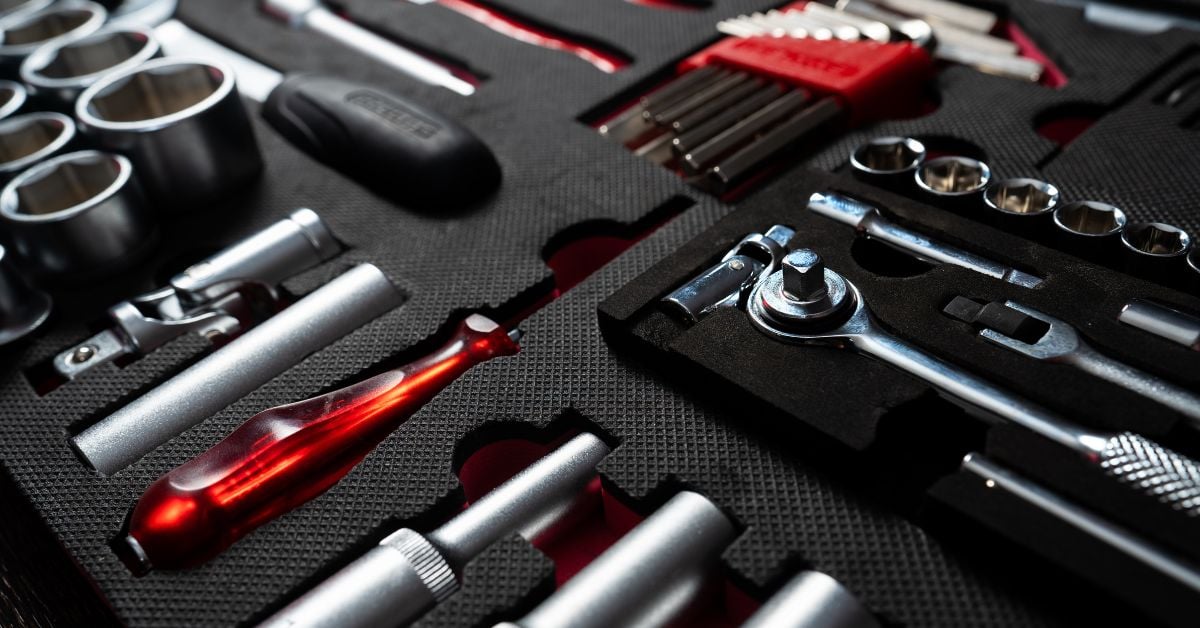
Before diving into panel replacement, gather the tools and materials you’ll need. Basic tools include a set of wrenches, a socket set, screwdrivers, a drill, a grinder or cut-off wheel, and a rubber mallet.
Additionally, you may need specialized tools, such as a panel removal tool, welding equipment (if welding is required), and protective gloves and eyewear. It’s also essential to have replacement parts like clips, rivets, adhesives, body filler, and sealant to ensure a watertight fit. Preparation is key, so check your vehicle’s specific requirements to avoid last-minute surprises.
Step Four: Removing the Damaged Panel
Removing the old, damaged panel is often one of the trickiest parts of the job. Begin by disconnecting any electrical components attached to the panel, such as lights or sensors, as well as any rubber molding or accessories like running boards.
Carefully remove any fasteners, bolts, and clips holding the panel in place. If you are just replacing a section of the panel, you’ll need to use a grinder to cut the welds, being careful not to damage adjacent parts.
Once you’ve removed all connectors, gently tap the panel with a rubber mallet or pry it off with a panel removal tool, applying steady pressure to avoid bending nearby metal.
Step Five: Prepping the Mounting Area
With the damaged panel removed, inspect the mounting area thoroughly. Look for signs of rust, corrosion, or structural issues that could compromise the new panel’s installation.
Sand down rust spots and apply rust-proofing agents to prevent future corrosion. Ensure the mounting surface is smooth and free from debris. This step allows the new panel to attach securely and creates a seamless appearance once installed.
Step Six: Fitting the New Panel
Before securing the new panel, it’s wise to perform a dry fit by positioning it over the mounting area without fastening it. This step lets you check the alignment and make any necessary adjustments before permanent installation.
If the fit is slightly off, use a file or sanding tool to smooth the edges for a snug fit. Proper alignment is crucial for appearance and function, so take your time and ensure everything lines up perfectly.
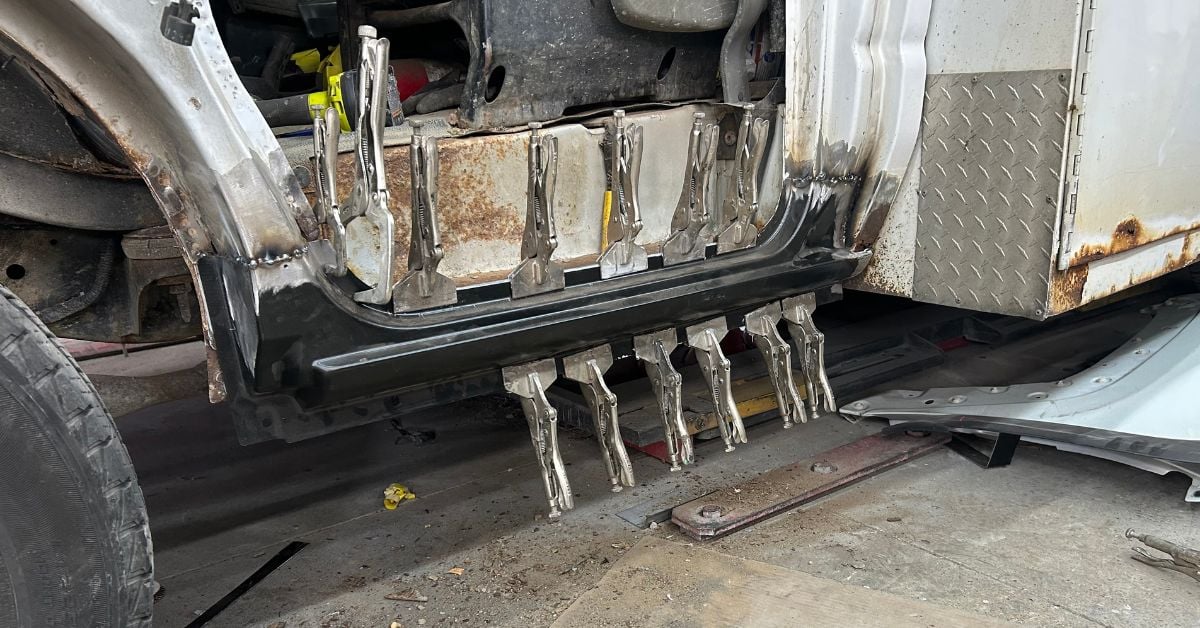
Step Seven: Attaching the New Panel
Once you’re satisfied with the panel’s fit, it’s time to attach it. Depending on your vehicle’s model and the panel type, you may need to use rivets, bolts, or welding.
Begin by securing one end and working across the panel, tightening each fastener as you go. If you’re welding, apply small tack welds at various points to hold the panel in place, then fill in the gaps with continuous welding; this method prevents warping due to excessive heat. For bolt-on panels, use a torque wrench to tighten the bolts to the specified level to ensure durability without damaging the threads.
Step Eight: Body Filler and Sealant
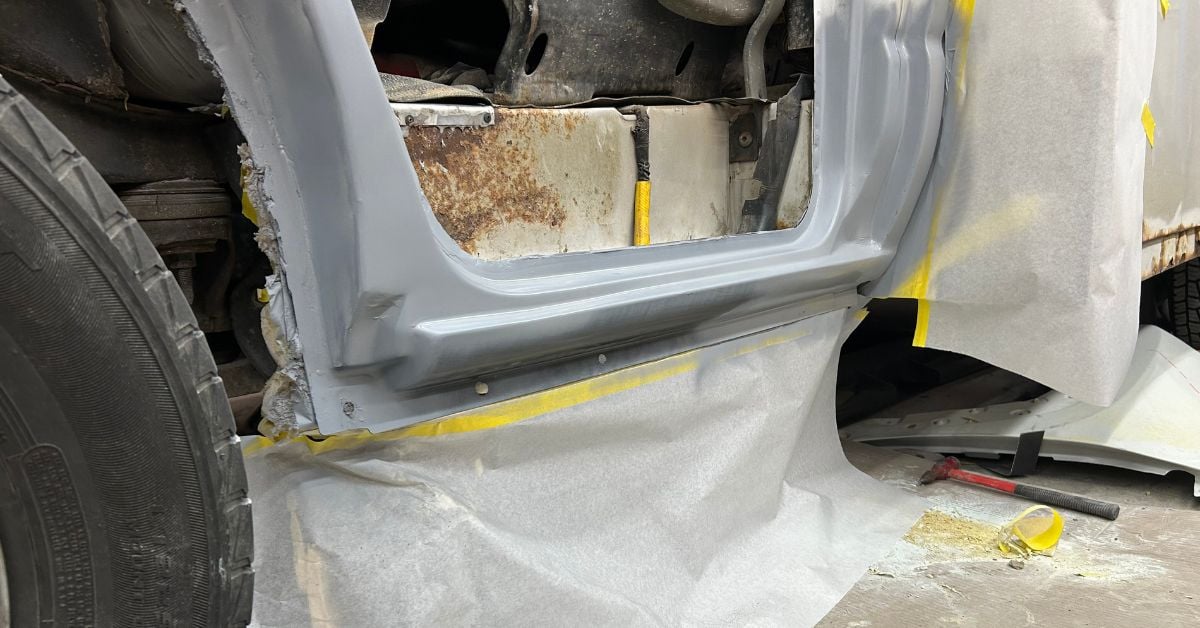
Depending on the type of panel used and the installation method, body filler may be needed to seamlessly blend the panel in with the rest of the vehicle. Look for any low spots that don’t match up with the body lines of your vehicle. Apply your choice of body filler to the low spots, then sand down the body filler to perfectly blend the panel in with the rest of your vehicle.
After securing the panel and applying any necessary body filler, some panels require edge sealing to protect against moisture and debris. Use automotive-grade sealant and apply a thin, even bead along the panel’s perimeter.
If the panel connects to areas exposed to water, consider applying a double layer for added protection. Sealing is essential to prevent rust and corrosion, which can shorten the life of the new panel. Allow the sealant to cure for the recommended amount of time before exposing your van to the elements.
Step Nine: Painting and Finishing Touches
The second to last step is to prime and paint the panel to match your vehicle. Begin by cleaning the panel with a wax and grease remover, leaving a smooth surface for the paint to adhere to.
Use a primer before applying color-matched paint in even coats. Allow each coat to dry before applying the next, following the manufacturer’s instructions.
Once the color is complete, apply a clear coat for added durability and shine. Buff out any imperfections for a flawless finish that matches the surrounding bodywork.
Step Ten: Inspecting and Maintaining Your New Panel
After completing the installation, inspect your work to ensure everything is secure and aligned. Check the panel for any gaps or loose fasteners and adjust as needed.
Regular maintenance is key to extending the life of your new panel. Clean it frequently to remove dirt and salt that can cause rust, especially if you drive in harsh weather conditions. Regularly inspect the paint for any signs of wear and reapply as necessary to keep the panel in top shape.
Replacing auto body panels on a car, truck, or van may seem like a daunting task, but with the right tools, preparation, and patience, it’s a job you can finish yourself. Our complete guide to replacing auto body panels can help you add years to your vehicle’s lifespan and protect it from potential damage.
The results will make your ride look brand new, offering aesthetic and functional benefits that last. If you need high-quality, professional auto parts, look no further than Mill Supply. We carry an array of premium auto body panels and other replacement parts to improve your vehicle’s performance and longevity.
Leave a Reply