Discovering rust on your cherished van or vehicle can be disheartening. That creeping reddish-brown corrosion not only looks bad but also threatens your vehicle’s structural integrity and resale value. The good news is that with the right approach and a little know-how, you can tackle the problem yourself. This guide will walk you through essential tips for a seamless and successful rust repair project, transforming your car into looking brand-new again.
Assessing the Extent of the Rust Damage
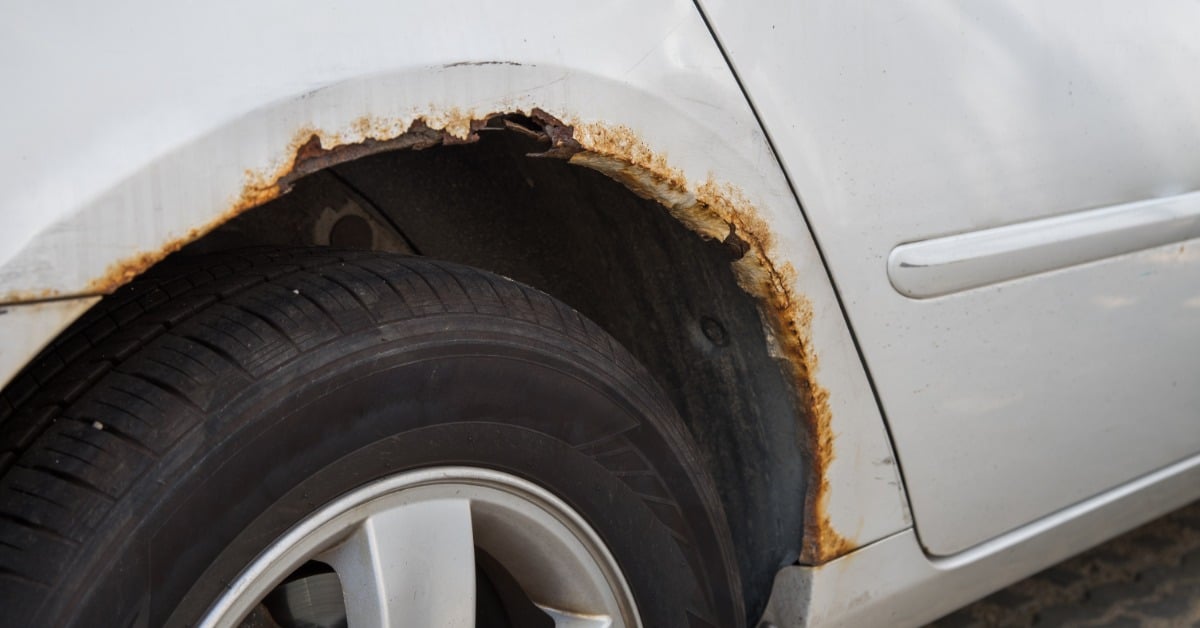
Before you can start any repair, you need to understand what you’re up against. A thorough inspection is the critical first step. You’ll need to determine if you’re dealing with surface rust, which is mostly cosmetic, or something more serious like scale rust or penetrating rust that has eaten through the metal.
Identifying Different Types of Rust
Look closely at the affected areas. Surface rust usually appears as small, flaky specks on the paint and hasn’t compromised the metal’s strength. You can typically remove it with simple abrasion.
On the other hand, scale rust creates pits and bubbles under the paint, indicating a more advanced stage of corrosion. The most severe form, penetrating rust, results in holes and requires cutting out the damaged metal and welding in a new patch panel. Be honest about the severity, as this will dictate your entire repair strategy.
Gathering Your Safety Gear
Working with rust involves grinding, chemicals, and paint, so your safety is non-negotiable. Before you even touch the vehicle, make sure you have the right personal protective equipment (PPE).
This includes safety goggles to protect your eyes from metal filings and debris, a respirator or dust mask to prevent inhaling harmful particles and fumes, and durable gloves to protect your hands from sharp metal and chemicals. Working in a well-ventilated area, like an open garage or outdoors, is also pivotal.
Preparing the Surface for Repair
Proper preparation is the foundation of a lasting rust repair. If you rush this stage, the rust will likely return, and all your hard work will be for nothing. The goal here is to create a clean, smooth, rust-free surface ready for priming and painting.
Removing the Rust Completely
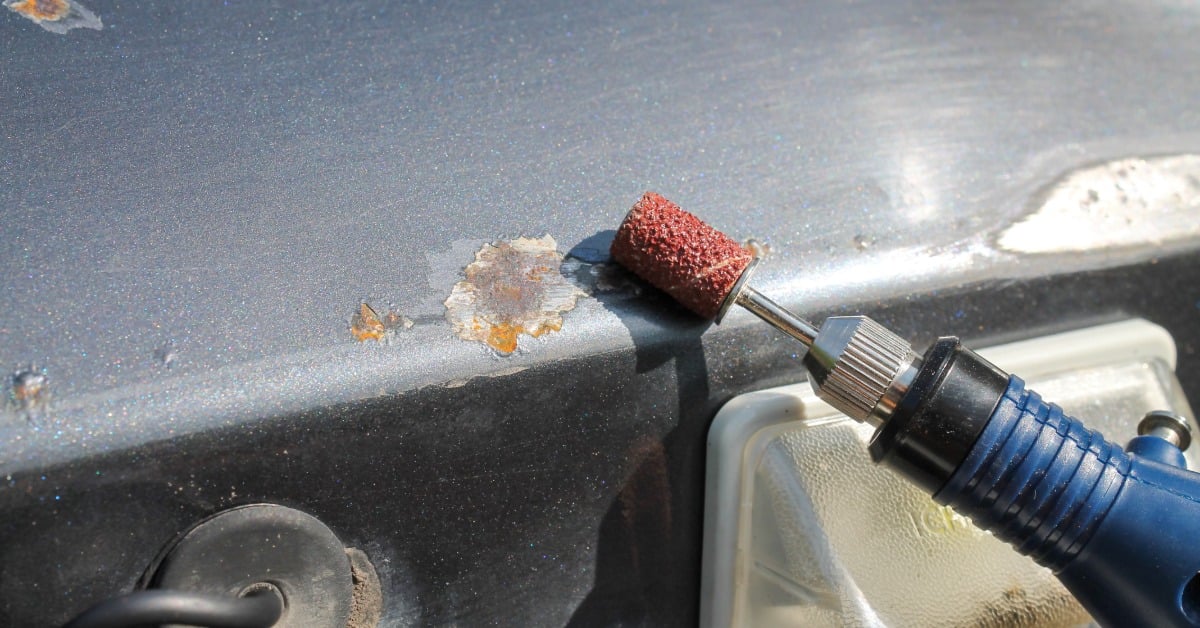
Your first task is to remove every trace of rust. For minor surface rust, a wire brush, sandpaper, or a scuff pad might be all you need. For stubborn scale rust, use a power tool like an angle grinder with a wire wheel or a sanding disc.
Be methodical and work your way from coarse to fine grit to feather the edges of the paint around the repair area. The objective is to get down to clean, bare metal without causing unnecessary damage to the surrounding panel.
Cleaning and Degreasing the Area
Once the physical rust is gone, the surface needs to be meticulously cleaned. Any remaining dust, grease, or contaminants will prevent the primer and paint from adhering correctly. Use a wax and grease remover or a specialized auto body solvent, along with a clean, lint-free cloth, to wipe down the entire repair area.
Make sure the surface is completely dry before moving on to the next step. This simple cleaning process can drastically impact the final quality of your repair.
Applying Body Filler and Primer
Once you have a clean, rust-free surface, it’s time to restore the panel’s original shape and protect the bare metal. This is where body filler and primer come into play. These materials work together to create a smooth, durable foundation for your new paint.
Using Body Filler for Pits and Dents
If the rust removal process left behind any low spots, pits, or dents, body filler is the solution. Mix the filler with its hardener according to the manufacturer’s instructions; getting this ratio right is essential for proper curing. Apply a thin, even layer over the imperfections using a plastic spreader.
It’s better to apply multiple thin coats rather than a single thick coat. Once the filler has hardened, sand it down until it’s perfectly level with the surrounding metal, again working from a coarser to a finer grit sandpaper for a seamless finish.
Protecting the Metal With Primer
Primer is the unsung hero of any paint job. It serves two main purposes: protecting the bare metal from future rust and providing an ideal surface for paint to stick to. Apply several light coats of a quality automotive primer over the repaired area, extending it slightly onto the feathered paint.
Allow each coat to dry completely before applying the next. After the final coat is dry, lightly sand it with fine-grit wet-or-dry sandpaper to create an ultra-smooth surface for the topcoat.

Painting and Finishing Your Project
This is the final and most visible stage of the repair process. Applying paint and a clear coat will not only make the repair disappear but will also provide the ultimate layer of protection against the elements.
Matching Your Vehicle’s Paint Color
Getting the paint color right is key to a professional-looking repair. You can find your vehicle’s paint code on a sticker located in the driver’s side door jamb, under the hood, or in the glove box.
Take this code to an auto parts store that specializes in paint mixing to get an exact match. It’s wise to test the paint on a scrap piece of metal or an inconspicuous area to ensure the color is perfect before applying it to your repair.
Applying the Paint and Clear Coat
With your color-matched paint in hand, apply it in several thin, even coats over the primed area. Hold the spray can or gun about 10–12 inches from the surface and use a smooth, sweeping motion. Allow adequate drying time between coats.
After you’ve achieved full coverage with the base coat, it’s time to apply the clear coat. The clear coat adds gloss and a crucial layer of UV and scratch protection. Apply it in the same manner as the base coat, using two or three light coats.
Achieve a Flawless Finish
With the final clear coat applied and fully cured, you’re in the home stretch. By following these tips for a seamless and successful rust repair project, you’ve not only restored your vehicle’s appearance but also added years to its life.
This process requires patience and attention to detail, but the result is incredibly satisfying. Keep in mind that regular washing and waxing will help protect your hard work and keep rust at bay for the future!
Looking to replace auto body repair panels? Mill Supply has you covered! We pride ourselves on offering premium-quality components that fit a wide range of vehicle models, ensuring durability and a perfect fit every time. Explore our extensive inventory and find the ideal panels for your needs today!
Leave a Reply