Classic vehicle restoration is an intricate and rewarding process that transforms rusted relics into stunning showpieces that capture their original charm. This comprehensive process requires patience, a high level of skill, and careful planning to achieve professional results. In this guide, we will walk you through the process of restoring a classic vehicle.
Draft a Restoration Plan
Planning sets the foundation for a successful restoration project. Start by selecting a vehicle for your skill level and budget. Also, research the vehicle’s history and original specifications to understand what you’re working with.
We recommend setting clear restoration goals before you begin any work. Then, decide whether you want a complete frame-off restoration, a partial restoration, or a rest-o-mod that combines classic styling with modern performance. Your goals will determine the scope of work and budget requirements for your project.
Set a Restoration Budget
When planning your restoration project, it’s important to establish a realistic budget that accounts for all aspects of your restoration project. You can look at current market prices for parts, materials, and professional services you might need to make informed decisions about where to allocate resources.
Keep in mind that total costs can vary depending on whether you purchase new, used, or reproduction parts. Classic car restoration projects almost always cost more than originally planned, so a good rule of thumb is to add 20–30 percent to your initial estimate for unforeseen expenses.
Assess the Vehicle’s Condition
Once you’ve attained your vehicle, conduct a systematic evaluation of every major component and system. Start with the frame and structural elements, carefully checking for rust, damage, or signs of previous repairs. Next, move on to examine the body panels, doors, and trim pieces, looking for dents, rust, or alignment issues.
Finally, evaluate the engine, transmission, and other mechanical systems by checking fluid levels, listening for unusual noises, and testing basic functions where possible. This assessment helps you understand the scope of mechanical work required and identify any major issues that might affect your restoration approach.

Gather the Appropriate Tools and Parts
The next step in the classic vehicle restoration process is to set up your workspace. Basic requirements include socket sets, wrenches, screwdrivers, pliers, and specialized automotive tools. Quality tools are a worthwhile investment, as they will last throughout your project and for future maintenance.
Source replacement parts from reputable suppliers who specialize in classic vehicles. Original equipment manufacturer (OEM) parts offer the best fit and authenticity, but reproduction parts provide affordable alternatives for common components. Ordering parts early in the project timeline prevents delays, as specialty parts may take weeks or months to arrive.
Disassemble the Vehicle
You should remove vehicle components in a logical order that allows easy access to all areas. Work systematically from top to bottom and outside to inside, starting with easily removable items like seats, trim pieces, and accessories, before moving to complex systems like the engine and transmission.
It is wise to keep detailed records of disassembly with photographs and written notes, labeling all hardware and storing it in organized containers. This documentation is invaluable during reassembly when you need to remember how components fit together.
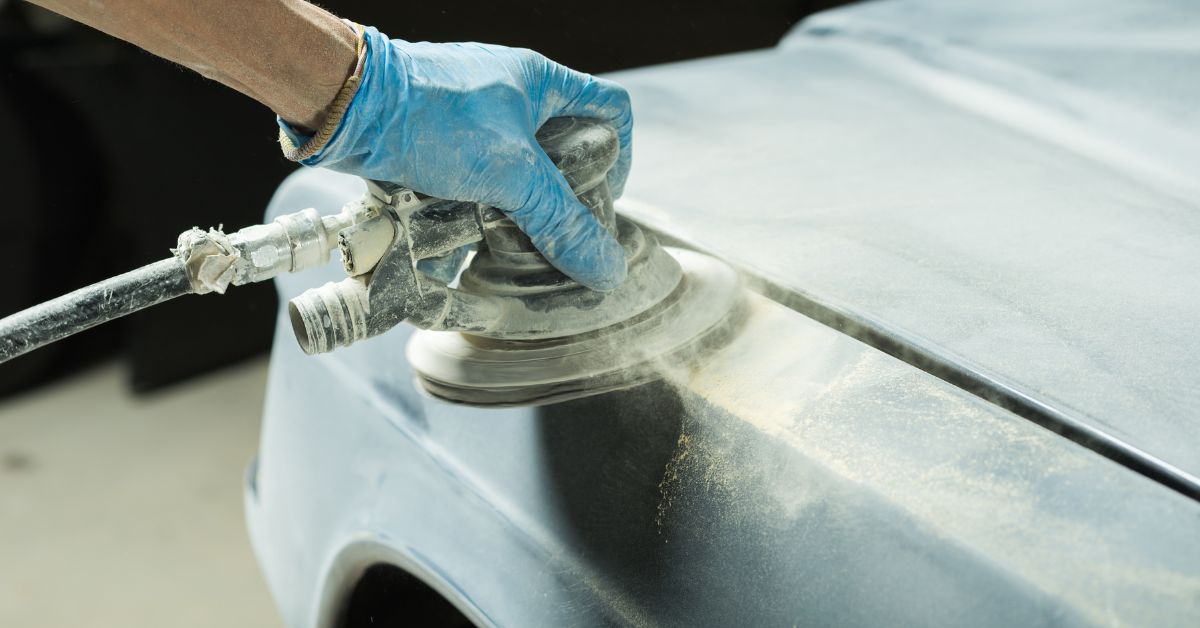
Complete Body Work and Rust Repair
Body restoration requires patience and attention to detail. During this process, you can remove all paint and primer to reveal the true condition of the metal underneath. We suggest dealing with rust damage promptly to prevent further deterioration using the appropriate method depending on its severity and scope.
For dents and misalignments, add and sand down body filler or make the necessary replacements for larger imperfections. Taking your time during this phase is crucial, as body work quality directly affects the final appearance.
Prime and Paint the Body Panels
Surface preparation supports paint adhesion and durability. Clean all surfaces thoroughly to remove dust, grease, and contaminants. The primer must be appropriate for your vehicle and the environmental conditions. For optimal adhesion, allow the entire curing time between coats and lightly sand between applications.
Choose high-quality automotive paint that matches your vehicle’s original color or your desired custom finish. To achieve even coverage, apply the base coat in light, overlapping passes. Then, apply a clear coat for protection and gloss, allowing adequate curing time in a dust-free environment.
Restore the Engine
Engine restoration begins with complete disassembly and thorough cleaning. Replace worn components, such as pistons, rings, bearings, and gaskets, as needed for optimal performance. Machine work may be necessary to restore proper tolerances and surface finishes. This could include boring or honing the cylinders, as well as turning or polishing the crankshaft.
When rebuilding the engine, you can follow manufacturer-recommended torque specifications and assembly procedures. During reassembly, install new filters, fluids, and wear items. Finally, test the engine before calling it quits to identify issues that need correction.
Refurbish Other Mechanical Systems
Other mechanical repairs may be necessary depending on your classic vehicle’s condition. This step often includes overhauling the transmission for smoother shifting, inspecting and repairing the suspension for better handling and ride quality, and restoring the braking system to improve stopping power.
In order to meet original specifications, you must carefully disassemble, clean, repair, or replace each component as needed. These meticulous repairs ensure your classic car performs as well as it did when it first rolled off the assembly line.
Replace Interior Upholstery
Interior restoration transforms your vehicle’s cabin into a comfortable space. To begin, carefully remove old upholstery and padding, using them as templates for your new materials. Clean and repair the underlying seat frames and interior panels before installing new materials.
When installing new upholstery, choose fabrics and colors that either match the original design or reflect your personal style for a polished look. New carpeting, door panels, and headliners complete the restoration as long as you use the right adhesives and fasteners. Carefully align new parts if you want to achieve professional-quality results.
Assemble the Vehicle
Reassembly requires patience and attention to detail. Follow your documentation and photographs to correctly install all components. We recommend installing the engine and transmission first, followed by suspension, brakes, and other mechanical systems.
You should reconnect all electrical systems and test them thoroughly. Install body panels, trim pieces, and interior components in logical order. At each step, check fit and finish carefully to identify and correct any issues immediately.
Apply Finishing Details
Final details bring your restoration project to completion. You can install trim, badges, and accessories using the correct hardware for authenticity, and polish chrome and stainless steel to a high shine. Perform thorough system checks, including lights, gauges, and electricals, and adjust doors, hood, and trunk for proper fit.
Finish by thoroughly cleaning the vehicle and applying protective treatments to preserve its condition. Your attention to these final details determines the quality and appearance of the restoration.

The process of a classic vehicle restoration combines technical skill, patience, and dedication. Each project teaches valuable skills and provides immense satisfaction when completed. Mill Supply carries truck parts and accessories to support enthusiasts with their restoration goals. We have a wide selection of parts, from slip-on auto body panels to OE-style panels of classic vehicles, to make your restoration project a success.
Leave a Reply