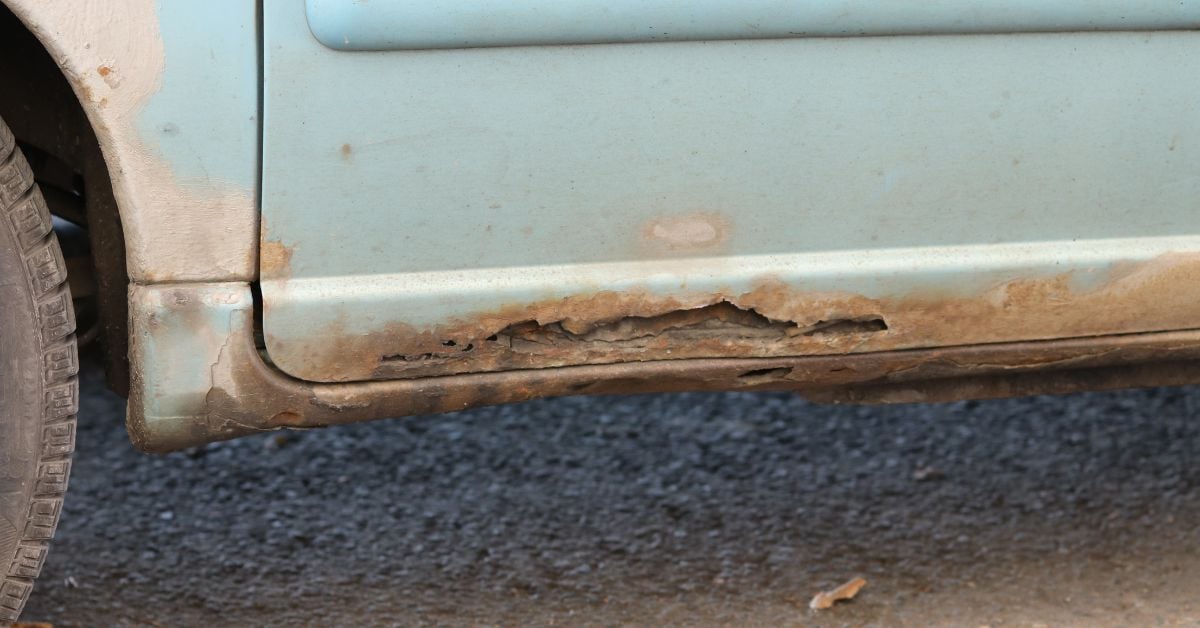
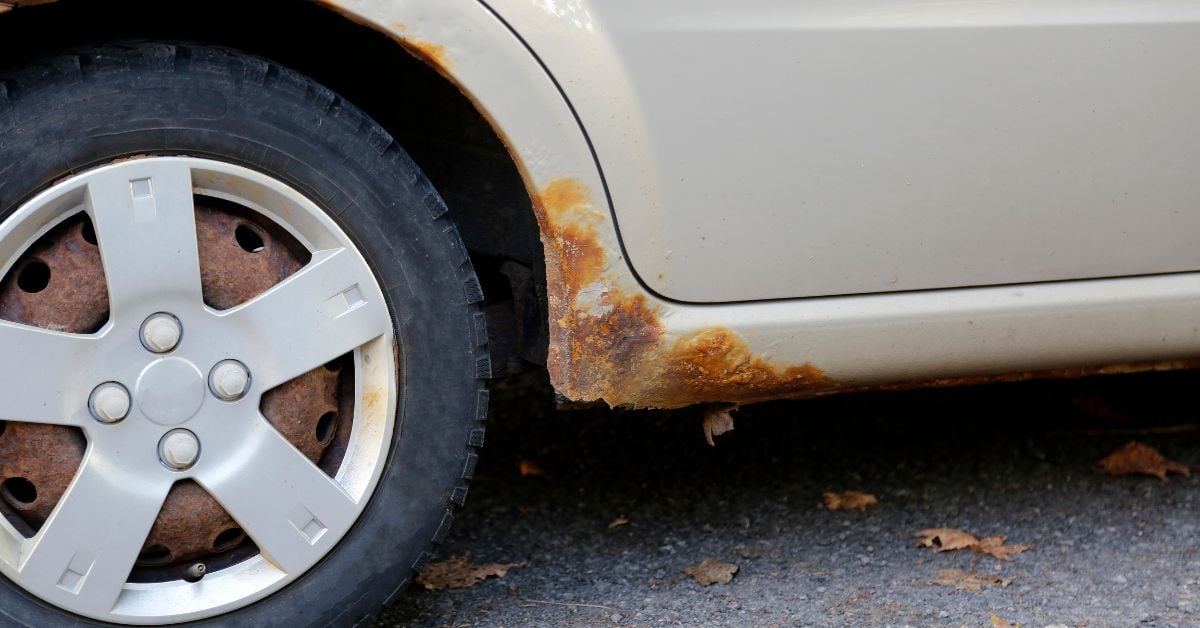
Rocker panels protect your vehicle’s frame from damage caused by road debris and moisture. Over time, these panels can rust or get damaged, requiring replacement. Slip-on rocker panels offer a straightforward solution for this common issue. Unlike full replacement rockers (or OE-Style rocker panels) that require welding, slip-on panels are designed for an easier installation process that you can complete with common tools.
This guide provides a clear path to help you properly install your new slip-on rocker panels, ensuring a durable repair that protects your vehicle. We will cover the necessary supplies, the step-by-step process, and practical considerations to help you decide if this is the right project for you.
Tools and Materials for Installation
Before you begin, gather all the necessary tools and materials. Having everything on hand will make the installation process smoother and more efficient. You will need an angle grinder and a wire brush to help you remove rust and prepare the rocker panel surface. These repairs also call for rust inhibitors to prevent future corrosion from forming under the new panel.
Depending on your choice of panel, acquire the appropriate fasteners, such as screws, rivets, or an automotive adhesive and its corresponding tools. To secure the slip-on panel and ensure a cohesive appearance, you will also need a rubber mallet, duck-bill clamps, body filler, and your automotive paint and primer of choice.
Step-By-Step Installation Instructions
Follow these detailed steps to correctly install your slip-on rocker panels. Each stage is important for achieving a seamless and durable result that will protect your vehicle for years to come.
Remove Rusted Rocker Panels
Your first step is to remove the rusted sections of the old rocker panel. Use an angle grinder to carefully cut away the damaged metal. Making clean, straight cuts is vital, as it simplifies fitting the new slip-on panel.
Remove only the compromised metal, leaving as much of the original, healthy panel intact to provide a strong foundation. It is important to remove all compromised metal to prevent rust from spreading further after you install the new panel.
Clean the Rocker Panel
After removing the rusted sections, you need to thoroughly clean the remaining area. Use a wire brush attached to your drill or grinder to scrub away any remaining rust, paint, and debris from the original panel. A clean surface is crucial for proper adhesion and prevents future corrosion issues. Continue cleaning until you have exposed the bare metal, ensuring there are no loose materials or rust flakes left.
Apply a Rust Inhibitor
Once the area is clean and dry, apply a coat of rust inhibitor. This product chemically creates a protective barrier against moisture while the bare metal is exposed. Applying a rust inhibitor is a critical step to prevent rust from reforming underneath your new rocker panel. Allow the rust inhibitor to dry completely according to the manufacturer’s instructions before proceeding to the next step.
Measure the Slip-On Rocker Panel
Next, you need to verify that the new slip-on rocker panel fits correctly. Hold the new panel against the prepared area on your vehicle to check its alignment and length. If the panel is too long, you will need to trim it to size using your angle grinder.
Take precise measurements and mark the panel clearly before you make any cuts. A proper fit is essential for a seamless appearance and will make the attachment process much easier.
Attach the Slip-On Panel
With the preparation complete, you can now attach the slip-on rocker panel. If using an adhesive, apply it to the back of the new panel as directed by the manufacturer, then press it firmly into place. Use duck-bill clamps and self-tapping screws to hold the panel in place against your vehicle while the adhesive dries.
Next, use a rubber mallet to gently tap the panel to make sure it is fitted snugly against the vehicle’s body. The goal is to make the panel as flush as possible with the surrounding body panels so that it will blend in seamlessly.
Allow the adhesive to cure for at least 24 hours, or follow the manufacturer’s recommended drying time. Once dry, remove the duck bill clamps and self-tapping screws.
Add Body Filler Where Needed
After the panel is securely attached, you may notice some gaps or uneven areas between the new panel and the vehicle’s body. Apply a thin layer of body filler to these areas and fill in the screw holes to create a smooth, seamless transition. Let the filler dry completely, and then sand it down until it is flush with the surrounding surface. Repeat this process until you are satisfied with how well the new panel blends in with the rest of your vehicle. This step is key to achieving a professional, factory-like finish.
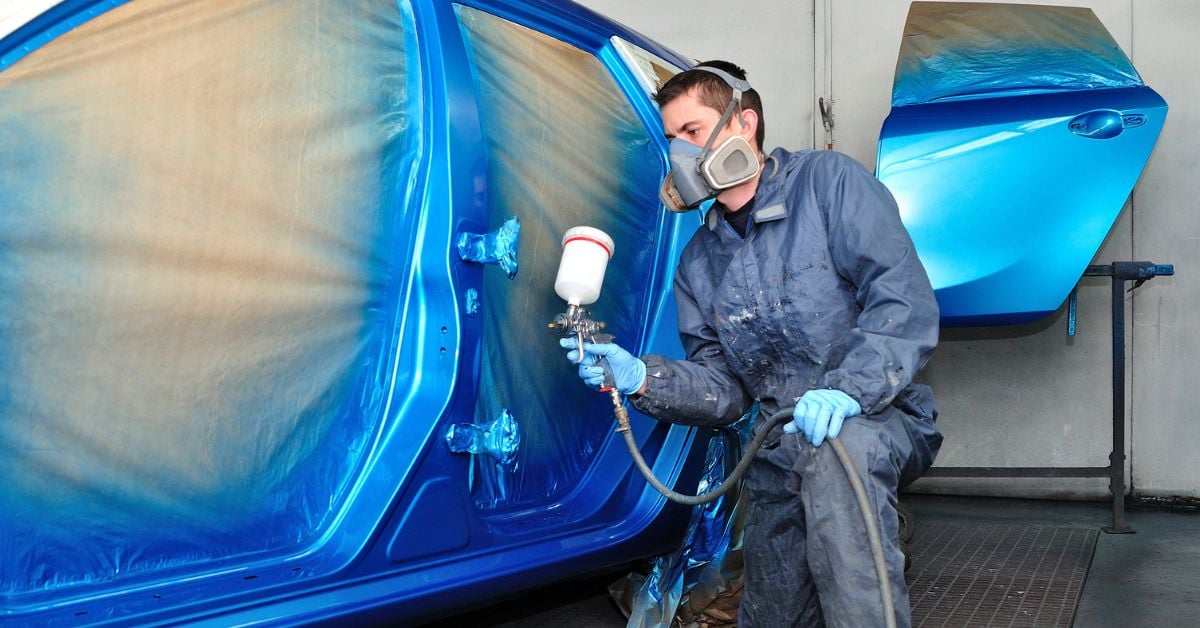
Prime and Paint the Rocker Panel
The final step is to prime and paint the new rocker panel. Apply a coat of primer over the body filler and the new panel. Once the primer is dry, it is recommended to add a layer of chip-guard to the bottom half of your panel. Chip-guard helps to protect your panel from small rocks and road debris.
After the chip-guard is dry, it is time for paint. Apply your vehicle’s matching paint color. You may need several coats to achieve the desired coverage. Finish with a clear coat to protect the paint and give it a glossy, professional appearance.
What To Know About Slip-On Rocker Panels
Slip-on rocker panels are a cost-effective and convenient option for repairing rust damage. The primary advantage is that they do not require extensive welding, which makes the installation process accessible to many DIY mechanics with basic tools. Additionally, because they are designed to fit over the existing structure, they can cover unsightly damage for mild rust repair jobs.
However, there are some drawbacks to consider. Slip-on panels may not offer the same structural integrity as an OE-Style replacement panel. If the rust damage is severe and has compromised the vehicle’s frame, a slip-on panel is not the right panel for the job. If you are unsure about your ability to perform the installation correctly, it is always a good idea to hire a professional body shop to do the work for you.
Get Your Vehicle Back in Shape
Installing new slip-on rocker panels is a straightforward project that can restore your vehicle’s appearance and protect it from further damage. By following the steps outlined in this guide, you can achieve a professional-quality repair right in your own garage.
Let Mill Supply be your trusted source of auto body panels for a wide range of vehicles, including step vans and medium-duty trucks. We’re here to keep your vehicles safe and operational by offering competitive prices and friendly, knowledgeable service. Shop our online catalog today!
Leave a Reply